
Manage your credentials
In most cases, Encamp handles credential management from implementation through reporting. However, there may be situations where you need to input credentials directly into Encamp or update them due to a recent password change. This article will guide you through adding, editing, and deleting credentials in the Encamp application.
Adding a Credential
To add a new credential:
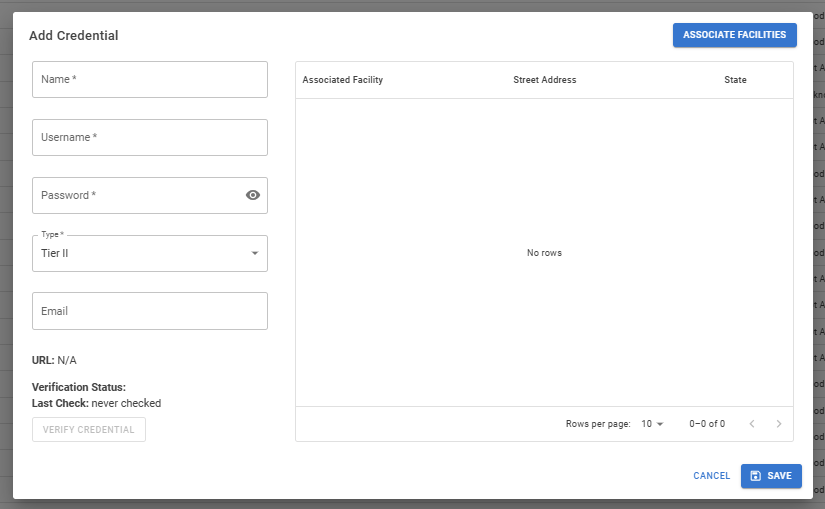
Click the Add Credential button.
Fill out the following fields:
In the Name field, add a unique name to identify the credential within the Encamp system (e.g., "Kentucky Credential"). This is not the username.
Add the username and password.
Select the type of portal this credential is for.
(Required in certain jurisdictions) Add the email address associated with the portal account. This field is required in state portals that utilize multi-factor authentication in order to log in.
Click the Associate Facilities button and select all facilities that are connected to this credential in the portal. Every credential must be associated with at least one facility.
Click Save.
Editing a Credential
To edit an existing credential:
(Optional) Use the search bar to find the credential you want to edit by the name, username, credential type, state, or associated facilities.
Click the Edit Credential button (pencil icon) next to the credential.
Update the details as needed, such as the name, username, password, portal type, or associated facilities.
Click Save to apply the changes.
Deleting a Credential
To delete a credential:
(Optional) Use the search bar to find the credential you want to delete by the name, username, credential type, state, or associated facilities.
Click the Delete Credential button (trash can icon) next to the credential.
Confirm the deletion when prompted.
Please note that deleting a credential is a permanent action and cannot be undone. Ensure that you have selected the correct credential before confirming the deletion.