
Working with documents
Encamp's Documents repository allows you to easily store and manage your organization's environmental compliance records.
This article explores different ways you can interact with your Documents repository.
Documents Table
The Documents table provides a holistic view into all documents that have been uploaded into Encamp across your organization.
Given the high volume of documents that can be created and added to the organization's repository, using a combination of the search and filters may be necessary to locate the correct document.

The default view shows the following columns:
Name: The filename of the document. This can be edited directly within the repository.
Type: The type of document, as selected from a pre-determined list. Note that new document types can't be added manually.
File Type: The file extension of the document.
Facility: Zero or more facilities that the document is associated with. Associating facilities to documents happens automatically with files created in other parts of Encamp.
Attached To: Whether there any chemicals in the chemical catalog that are associated with this document (e.g., using as a Safety Data Sheet)
Uploaded On: The date the file was uploaded to the repository.
Adding a Document
Documents can be added to the repository manually or automatically, from other interactions with the Encamp platform.
Manually Add a Document
To add a document to the repository:
Navigate to the Documents section in Encamp.
Click the Add Document button.
Drag and drop the document into the designated area or click to select the file from your computer.
Select a document type from the dropdown menu. This step is required to categorize your document accurately.
(Optional) Add any custom tags to the document that will be helpful for internal tracking purposes.
(Optional) Associate one or more facilities to the document. This links the document to specific facilities, making it easier to find and review records related to each facility.
Click Save to add the document to the repository.
Automatically Added Documents
In addition to manually uploading documents, Encamp automatically adds certain records to the Documents repository:
Documents generated through automated reporting: When you complete reporting tasks, such as submitting Tier II reports, the generated documentation is automatically stored in the repository.
Records from other Encamp modules: Documents created or uploaded in other parts of Encamp, like completed tasks, are automatically added to the repository.
These automatically added documents are categorized and associated with the relevant facilities.
Edit a Document
To edit a document's details:
(Optional) Use the search bar to find the document by file name, file type, or associated facility.
Click the Edit Document button (pencil icon) next to the document.
Update the file name, file type, or associated facilities as needed.
Click Save to apply the changes.
Replace a Document
To replace a document file:
(Optional) Use the search bar to find the document by file name, file type, or associated facility.
Click the Edit Document button (pencil icon) next to the document.
Click the Replace Document button (refresh icon).
Select the new file to replace the existing one.
(Optional) Adjust the file type or associated facilities if necessary.
Click Save to update the document.
Delete a Document
To delete a document from the repository:
(Optional) Use the search bar to find the document by file name, file type, or associated facility.
Click the Remove Document button (trash can icon) next to the document.
Confirm the deletion when prompted.
Please note that deleting a document is a permanent action and cannot be undone.
Deleting a file associated with an already-submitted report will not impact that report. However, deleting a file associated with an open report will remove the file from the report.
Ensure that you have selected the correct document before confirming the deletion.

Download a Document
To download a document from the repository:
Option 1: Direct Download
(Optional) Use the search bar to find the document by file name, file type, or associated facility.
Click on the file name to initiate the download.
The document will begin downloading, and you can find it in your browser's default download location.
Option 2: Download from Edit Screen
(Optional) Use the search bar to find the document by file name, file type, or associated facility.
Click the Edit Document button (pencil icon) next to the document.
In the top right corner of the edit screen, click the Download button.
The document will begin downloading, and you can find it in your browser's default download location.
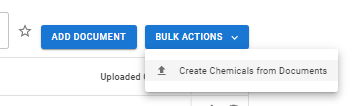
Bulk Actions
Create Chemicals from Documents
This feature allows users to take advantage of the Add Chemical from SDS functionality while navigating the Documents repository. It may be helpful for organizations that have large counts of Safety Data Sheets (SDS) in their Documents repository and need to make additions to their Chemical Catalog.
Select one or more documents by clicking the checkbox.
On the Bulk Actions menu, click Create Chemicals from Documents
Click Begin Extraction. A process will run in the background that will extract the information from the SDSs and create entries in the Chemical Catalog.
Any documents that were selected that are not of the Safety Data Sheet Type will be ignored during this extraction process.